
Local installation on Ubuntu
Prerequisites
Before starting, be sure your computer has the following software installed:
MacOS, Windows, or Linux (that’s what I am using).
PHP 8 or higher. Please check the Statamic requirements.
Composer to manage PHP packages.
Install Statamic CLI
To install Statamic on my local computer, I followed the steps from the Local Install guide on the Statamic website.
Install Statamic with Starter Kit
Now that Statamic is installed, it’s time to start a new project. I chose to use a Starter Kit, so that I can start with examples of templates, collections and settings. The Starter Kit of my choice was Cool Writings.
The command to start the new project is: statamic new walktowceu statamic/starter-kit-cool-writings.
This creates a directory walktowceu in which all necessary files will be placed to start the project.
Launch built-in Statamic server
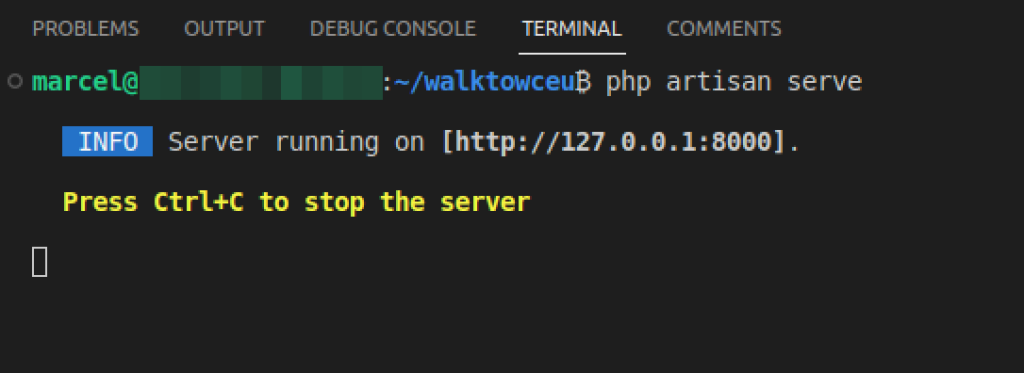
To launch the site, and see it on my local computer, I need to run the command php artisan serve in the walktowceu directory. Using VS Code I just open up a Terminal and run the command from there. I opened up http://127.0.0.1:8000 and there it was, the freshly created Statamic site with the Starter Kit active, and some demo content.
Setting the base structure
Ok, now the standard Statamic site is running on my local computer with some demo content. In this section I will show you how I created the structure for storing the content of the walktowc.eu website.
To do that, I will first tell you something about the structure of Statamic. In Statamic the content can be divided in these following groups:
Collections
Collections can be seen as custom post types (WordPress people will nod now). In Statamic, these are called containers that hold entries with their settings like URL patterns, routes and blueprints. I will explain more about these further on in this article.
Taxonomies
A taxonomy is used to classify data. In Statamic (and yes in other CMSes too) the taxonomies can be used to categorize entries. Like sponsor level for the site we are migrating for instance.
Navigations
Navigations can hold menus that cen be used on the site.
Assets
Assets are basicly any type of files that can be used in content. They can be images, videos, PDFs or any other type of file.
Forms
Yes, Statamic supports forms out of the box. Neat!

With this knowledge, it’s time to put together the site structure.
Site structure
To get all the content in the right places, the structure needs to be defined. Also, to get this done, the Statamic features can help to create this structure so we can actually add our content in Statamic.
I came up with the following:
- Collections
    - Pages
    - Articles
    - Sponsors
        - Taxonomy 'Sponsor level'
Applying the structure in Statamic
Sponsors Collection
Let’s start with a new Collection, since Pages and Articles are already available in Statamic. Via Collections -> Create Collection I have created a Sponsors collection.

Sponsor Level Taxonomy
In a likely manner the taxonomy for Sponsors will be created. Via Taxonomies -> Create Taxonomy I created the Sponsor level taxonomy. After the taxonomy is created, I clicked the Configure Taxonomy link to edit the freshly created taxonomy to set (or limit?) the Collection this taxonomy can be used with, so let’s add sponsors to that.

After saving it I added some terms, for this project I added Golden, Silver, Bronze Shoe and In-kind sponsors. Shoe, because, yeah the site is about a walk.
Creating the Blueprint for Sponsor Collection
To make it possible to add our structured content for the sponsors, a Blueprint is needed for Sponsors in Statamic. Via Collections -> Sponsors I clicked the three dots and then clicked Edit Blueprints.

After clicking on the Sponsors Blueprint, I can edit the Blueprint. This is basically the visual representation of how you want to enter the data for this Collection. I added a few Fields (Statamic has a lot!) like Title, Subtitle, Content, Logo, and Sponsor Level Taxonomy Terms.
In the image below you can see the New Entry screen which allows me to enter all the Sponsor data in a structured way in Statamic.

At this point the backend is ready for content, next step: Creating the frontend stuff.
Creating Views
Creating the Antler template files
Out of the box Statamic works with Antlers, and I decided to go with that. But, since I just started with Statamic, I had no clue where to place the templates for the views of Sponsors.
Statamic to the rescue, it can create scaffolding for the templates, meaning it will create empty template files in the right place. Just click the same three dots to see the “Edit Blueprints” link, and there it is, “Scaffold Views”.
Clicked it, left the defaults in place which resulted in two new files, index.antlers.html and show.antlers.html located in resources/views/sponsors.

There are two empty template files in the directory. And I have no clue on how to fill these files to show the sponsor content. But wait, Statamic comes with Articles, and they are visible on the site. So they should have templates. Lets take a look in resources/views/articles. Great, let’s copy the content of these files to the index and show templates for the Sponsors and adapt them to show the Sponsor fields. You can see the final result in the public repository here.
Applying the Sponsor view to a page
Things are going well, I’ve created the structure, Sponsor Collection, Taxonomy, Blueprint and template files.
To make sure the URL structure for Sponsors will be /sponsors/sponsor-title I need to set/check the routing, but first I need to create a page to show all the Sponsors. To do this I create a page with the name Sponsors and assigned the sponsors/index template to it.

Routing
Next step will be to make sure the URL structure does what I want it to be. Let’s open up the file content/collections/sponsors.yaml. This file contains all settings for our Sponsors Collection. I need to make sure the mount settings is set to mount: 88c467f5-488a-4f7a-820b-781e07055d30 (this is the page ID of the Sponsors page I created, and this ID can be found in /content/collections/pages/sponsors.md). Also, I set the route to route: '{mount}/{slug}'.
Customization
Adding the header logo
To add the header logo, the file layout.antlers.html in /views needs to be edited since we need to modify the base HTML structure.
I decided to add the logo with a partial to this file to include the logo. I created the partial in the /views directory and called it _logo.antlers.html. The code:
This partial can then be included in the layout.antlers.html file by placing {{ partial:logo }} right under the <body> tag.
Using Tailwind CSS
The starter kit I am using (Cool Writings) is built using Tailwind CSS. This takes some effort, cince I am used to doing basic CSS/SASS stuff. Maybe I should say all my previous CSS skills can now be thrown overboard for this project and I need to learn to use TailWind CSS. Luckily they have a nice Quick Search in their Docs so I can find classnames to be used easily.
When adding new classes to the Antlers/HTML files, you need to regenerate the CSS files Statamic uses. Just run npm run dev once, ornpm run watch to continuously monitor changed files and generate the tailwind.css file.
Protip
Take some time to watch Tailwind CSS screencasts/courses. It will really help you to understand how things work with Tailwind. Once you get used to it, it works so much faster.
Adding ratio styling for embedded videos
When embedding videos, we need to take care of the dimensions. Most videos are recorded in 16:9 ratio, when embedding I wanted to have the container that contains the video to have that ratio.
To do this, we can use the Aspect Ratio plugin for Tailwind. Just run npm install @tailwindcss/aspect-ratio@latest --save-dev and include the following in your tailwind.config.js file:
Now it’s possible to use a nice range of classes to have a container listen to a certain aspect ratio. The documentation contains all these classes, how to use them, and how to extend them if the defaults are not enough for you. As an example, for embedding YouTube videos I use this code to process a video field from the content Bard field:
Adding a gallery
I have also added a Lightbox component for galleries, as I’m sharing some nice pictures from my walk. I’ve chosen Fullscreen Lightbox. To use this nice plugin, all I needed to do was download the package from the site, save the fslightbox.js file in the /resources/js/ folder, and the following line to site.js in /resources/js/.
The sponsors page
Since the sponsors are divided into different levels, I wanted to show these with a certain priority. To to this I added the following code to the /resources/views/sponsors/index.antlers.html file:
In these four sections the sponsors with a certain taxonomy term are grabbed, and with the {{collection}} tag the info from this sponsor is displayed. Together with some Tailwind classes, the content is nicely displayed.
Including the Golden and Silver Shoe sponsors on every page
To include these sponsors on every page, a topsponsors partial was made named _topsponsors.antlers.html. This file is placed in the /resources/views/sponsors/ folder. Every default page should have these sponsors on the top of the page, therefore the file /resources/views/layout.antlers.html can be used to include the following code (at the right spot of course):
Now the sponsors get displayed on every default page/post.
Customize the homepage
The homepage is a collection of a three sections. We have the base title and content, which is managed from the page in Statamic, the latest blogs and the top tier sponsors.
To see the latest blogs I have added some code to the home.antlers.html view, here it is:
Basically, this piece of code gets the latest 6 news items, the featured image, title and date, and outputs these. The sponsors are added by the code in the previous paragraph. Hint: with the help of the {{ topsponsors }}partial.
Pagination on the news page
The final challenge is to create pagination on the news page, this is better for page loading speeds (yes, also for a static site) and usability.
Since the site is going to a static Statamic site, generated by SSG, some code needs to added. used this handy Statamic SSG Pagination guide from Jason Varga. To create the pagination links, the documentation of the {{ pagination }} tag was used and adapted to the layout of the website.
Summary
This has been a very nice project to learn more about Statamic. I’m very happy the website is migrated from Hugo, we just didn’t have a good match.
Now, the site can be easily edited and all generated static files can be hosted anywhere with little needed resources.